Table of Contents
- CH1 Green Beginnings: Why Home Gardening Matters
- CH2 Planning Your Garden: Setting the Foundation for Success
- CH3 Tools of the Trade: Essential Gardening Equipment for Beginners
- CH4 Soil Science: Preparing Your Garden’s Foundation
- CH5 Seeds and Starters: Choosing and Planting the Right Greens
- CH6 Watering Wisdom: Techniques for Healthy Plants
- CH7 Nurturing Growth: Fertilizers, Mulch, and Plant Care
- CH8 Troubleshooting: Diagnosing and Solving Common Garden Problems
- CH9 Seasonal Gardening: Adapting Your Garden Throughout the Year
- CH10 Harvest and Beyond: Enjoying and Sustaining Your Garden’s Bounty
Green Beginnings: Why Home Gardening Matters
Green Beginnings: Why Home Gardening Matters
Discover the Benefits and Joys of Starting Your Own Home Garden
Imagine stepping outside your door to pick fresh tomatoes, fragrant herbs, or vibrant flowers you grew yourself. This simple act connects you to nature, promotes well-being, and offers a sense of accomplishment few other hobbies can match. As a Garden Expert, I’ve witnessed countless beginners transform their spaces and lives through home gardening. Whether you have a sprawling backyard or just a small balcony, starting a garden is a rewarding journey that anyone can embark on.
The Growing Appeal of Home Gardening
Home gardening has surged in popularity worldwide, and for good reason. Beyond the obvious pleasure of nurturing plants, it offers tangible benefits that improve your quality of life. In my experience as a Garden Expert, I’ve seen novices blossom into confident gardeners who not only grow food but also cultivate mindfulness and sustainability.
Health Benefits: More Than Just Fresh Food
One of the most compelling reasons to start a home garden is the impact on your health. Gardening is a gentle form of physical exercise. Activities like digging, planting, weeding, and watering engage multiple muscle groups and promote flexibility. According to health studies, spending time in a garden can reduce stress hormones, lower blood pressure, and improve mood.
Growing your own fruits and vegetables ensures access to fresh, pesticide-free produce. For example, a friend of mine started a small kitchen garden with leafy greens and herbs. Over time, she found her diet improved significantly, and she enjoyed the vibrant flavors of homegrown food that supermarket produce simply couldn’t match.
Environmental Impact: Cultivating Sustainability
In an age of growing environmental concerns, home gardening offers a practical way to reduce your carbon footprint. By growing your own food, you cut down on the energy and resources spent on commercial agriculture, packaging, and transportation.
Home gardens also support biodiversity. Planting a variety of flowers and native plants attracts pollinators such as bees and butterflies, which are crucial for ecosystem health. A case in point is a community garden I helped establish, where gardeners noticed an increase in local bird and insect populations within months.
Economic and Practical Advantages
Saving Money While Growing Your Pantry
Starting a home garden can be cost-effective. Seeds and starter plants are relatively inexpensive, and the yield from a well-maintained garden often exceeds the initial investment.
Consider the example of a family who, after planting tomatoes, peppers, and herbs in raised beds, reported saving hundreds of dollars annually on groceries. Not only did they reduce their food expenses, but they also enjoyed meals prepared with ingredients picked fresh moments before cooking.
Food Security and Independence
Growing your own vegetables and herbs provides a degree of food security. In unpredictable times, having a reliable source of fresh produce can be invaluable. Additionally, gardening encourages self-reliance and empowers you to take control over what you consume.
During recent supply chain disruptions, many novice gardeners told me they felt more confident knowing they had fresh food growing at home. This peace of mind is a powerful motivator to maintain and expand their gardens.
The Psychological and Emotional Rewards
Connecting with Nature and Mindfulness
Gardening fosters a deep connection with the natural world, which can be profoundly therapeutic. The act of caring for plants encourages mindfulness—being fully present in the moment—and provides a break from the digital distractions that dominate modern life.
One beginner gardener shared with me how tending to her plants became her daily meditation, helping her cope with anxiety and find joy in small, consistent achievements as seedlings grew into thriving plants.
Building Confidence and Creativity
Starting a garden is a learning process filled with experimentation. Every success, such as a flourishing herb patch, and every setback, like a pest infestation, teaches valuable lessons. This journey builds confidence and nurtures creativity as you design your garden layout, choose plant combinations, and solve problems.
Social and Community Connections
Gardening often leads to meaningful social interactions. Whether through sharing seeds, exchanging tips, or participating in local gardening clubs, it fosters a sense of community.
I’ve seen neighbors who barely spoke before becoming gardening enthusiasts come together over shared interests—trading produce, helping each other with planting techniques, and even collaborating on community garden projects. These connections enrich lives far beyond the garden plot.
Getting Started: The First Steps
Embarking on your gardening journey begins with understanding your space and goals. Reflect on what you want to achieve: fresh herbs for cooking, colorful flowers to beautify your home, or vegetables to supplement your diet. Consider your available space, sunlight, and time commitment.
For instance, if you live in an apartment, container gardening on a balcony or windowsill can be highly effective. If you have a yard, you might start with a small raised bed or a few garden boxes. Starting small allows you to build skills and confidence before expanding.
Summary and Key Takeaways
- Home gardening offers numerous benefits including improved health, environmental sustainability, financial savings, and emotional well-being.
- Growing your own food increases food security and promotes independence.
- Gardening fosters mindfulness, creativity, and community connections.
- Starting your garden begins with assessing your space, goals, and resources.
As we move forward, the next chapter will guide you through the essential preparations for your garden—choosing the right plants, understanding soil, and selecting tools. With a solid foundation in place, your green beginnings will soon flourish into a thriving home garden.
Planning Your Garden: Setting the Foundation for Success
Planning Your Garden: Setting the Foundation for Success
Design Your Garden According to Your Needs and Surroundings
When I began gardening, I felt overwhelmed by the many choices and decisions ahead of me. Where is the best spot to plant? What varieties should I choose? How much room will I require? Over time, I realized that the key to successful gardening lies in careful planning—a vital step that lays the groundwork for a flourishing garden. Whether you have a large backyard or just a cozy balcony, creating a design that fits your specific needs and environment can help make your gardening aspirations come true.
Understanding Your Space and Environment
The first step in planning your garden is to take a close look at the space you have available and the natural conditions of your environment. As a Garden Expert, I’ve seen many beginners start planting without considering these factors, only to face disappointing results. Knowing your garden’s environment helps you choose plants that will thrive and make the most efficient use of your space.
Assessing Your Garden Space
Begin by measuring your garden area. Is it a large backyard, a modest patio, or a sunny windowsill? Sketch a simple map to scale, noting features such as existing trees, pathways, fences, and buildings. This visual guide will help you visualize how much space you have and where plants can be placed.
For example, a friend of mine had a small urban backyard shaded by a large oak tree. By mapping the garden, she realized that only certain areas received sufficient sunlight. This insight helped her select shade-tolerant plants and avoid wasting effort on sun-loving flowers that wouldn’t survive.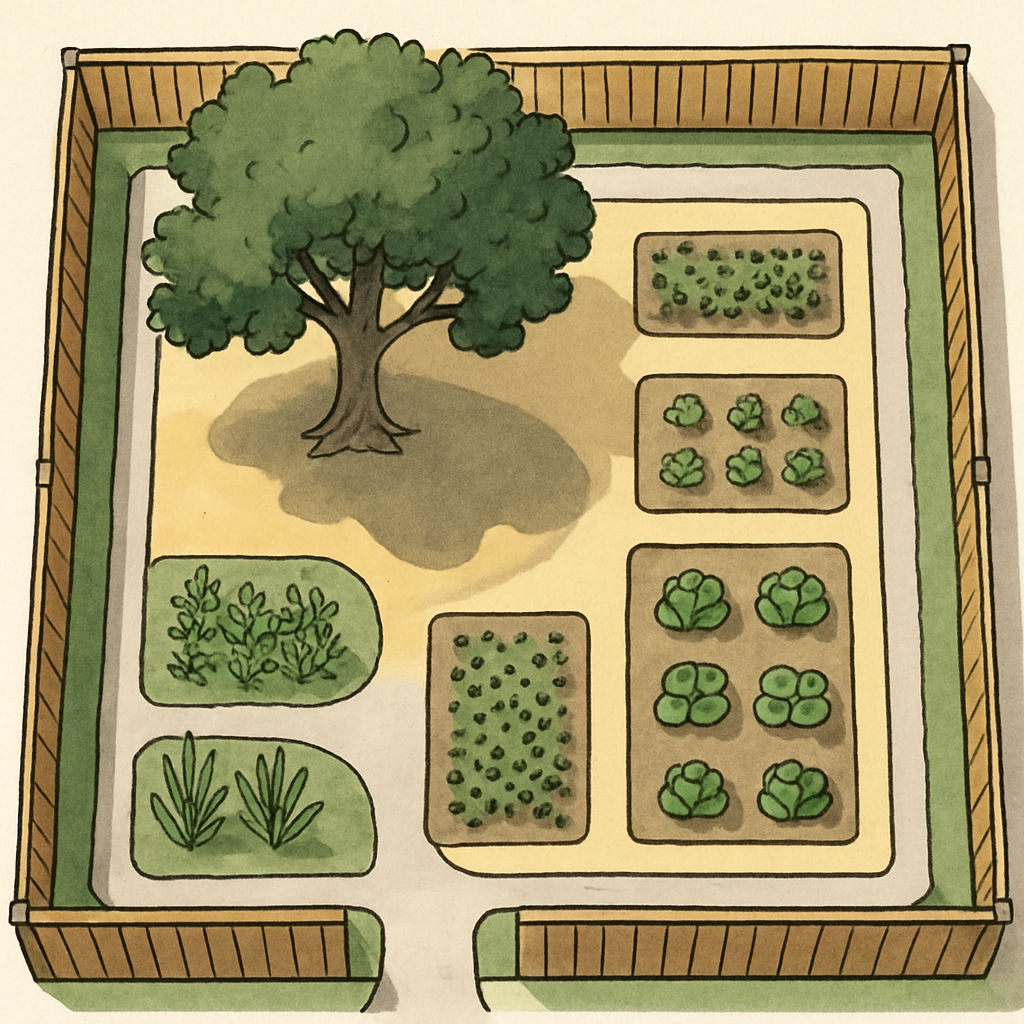
Evaluating Sunlight and Shade
Sunlight is one of the most critical factors in successful gardening. Different plants require different amounts of light, so understanding the patterns of sun and shade in your garden is essential. Observe your garden throughout the day and note which areas receive full sun (6 or more hours), partial sun/shade (3-6 hours), or full shade (less than 3 hours).
In my experience as a Garden Expert, keeping a sunlight diary for a few days can reveal surprising patterns. For instance, a spot that looks sunny in the morning might be shaded by a neighboring building in the afternoon. This knowledge allows you to position your plants where they will thrive rather than struggle.
Soil Type and Quality
Healthy soil is the foundation of a flourishing garden. Before you start planting, it’s important to understand your soil’s texture, drainage, and nutrient content. You can perform simple tests at home or send a soil sample to a local extension service for analysis.
- Soil Texture: Is your soil sandy, clayey, or loamy? Sandy soil drains quickly but holds fewer nutrients, while clay soil retains water but may become compacted. Loamy soil, a balanced mix, is ideal for most plants.
- Drainage: Poor drainage can cause root rot. To test, dig a hole about a foot deep and fill it with water. If it drains within a few hours, drainage is good; if not, consider raised beds or soil amendments.
- Soil pH and Nutrients: Some plants prefer acidic soil, others alkaline. A soil test will reveal pH and nutrient levels, guiding your choice of plants and fertilizer.
One of my clients had heavy clay soil that hindered vegetable growth. We amended it with organic compost and sand, improving texture and drainage. The garden quickly responded with healthier, more productive plants.
Defining Your Gardening Goals
Before you finalize your garden plan, it’s vital to clarify your goals. Are you growing flowers for beauty, vegetables for fresh produce, herbs for cooking, or a combination? Knowing your objectives helps you prioritize space and resources effectively.
Choosing Plants Based on Your Needs
Consider what you want from your garden. If you’re interested in fresh herbs and vegetables, a sunny spot with rich soil is essential. For ornamental flowers, you might focus on color and seasonal blooms. Some beginners dream of a pollinator-friendly garden to attract bees and butterflies, which also supports local ecosystems.
For example, I once worked with a family who wanted a garden that their children could enjoy and learn from. We designed a small vegetable patch alongside colorful flowers and a butterfly-friendly border, fulfilling both educational and aesthetic purposes.
Matching Plants to Your Climate and Season
Your local climate and gardening zone determine which plants will flourish. Consult a plant hardiness zone map to choose species suited to your area’s temperature ranges and seasonal patterns. Starting with native or well-adapted plants increases your chances of success and reduces maintenance.
For instance, in warmer climates, drought-resistant plants such as succulents or Mediterranean herbs thrive, while cooler regions may favor cold-hardy vegetables and perennials.
Designing Your Garden Layout
With information about your space, environment, and goals in hand, you can begin designing your garden layout. Good design optimizes space, maximizes plant health, and makes maintenance easier.
Organizing Plants by Their Needs
Group plants with similar water, light, and soil requirements together. This practice, known as “hydrozoning,” conserves water and simplifies care. For example, place drought-tolerant plants in one area and moisture-loving species in another.
Considering Accessibility and Maintenance
Plan paths or stepping stones to access plants easily without compacting your soil. Raised beds or containers can reduce bending and make gardening more comfortable, especially if you have limited mobility.
One beginner I advised installed wide paths and raised beds, which allowed her to tend her garden comfortably and enjoy it fully without strain.
Incorporating Vertical and Container Gardening
If space is limited, consider vertical gardening options such as trellises, wall-mounted planters, or hanging baskets. Containers are also versatile and can be moved to capture sunlight or protect sensitive plants from harsh weather.
Summary and Key Takeaways
Planning your garden carefully lays the groundwork for a successful and enjoyable gardening experience. By thoroughly assessing your space and environment, defining clear goals, and designing a thoughtful layout, you maximize your chances of growing healthy plants that meet your needs.
- Measure and map your garden space, noting sunlight patterns and physical features.
- Test and improve your soil to provide the best foundation for plant growth.
- Clarify your gardening goals to select plants that match your lifestyle and preferences.
- Design your garden layout to group plants by needs, improve accessibility, and optimize space.
- Consider your local climate and select plants suited to your zone for easier success.
In the next chapter, we will explore the essentials of preparing your soil and selecting the right tools to get your garden ready for planting. With a well-planned garden design in place, you’ll be ready to bring your vision to life.
Tools of the Trade: Essential Gardening Equipment for Beginners
Tools of the Trade: Essential Gardening Equipment for Beginners
Identify and use the right tools to make gardening easier and more enjoyable
When I first started gardening, I underestimated the importance of having the right tools on hand. Like many beginners, I thought a simple trowel and some gloves would be enough to tackle any gardening task. But I quickly learned that having the proper equipment not only makes gardening easier but also more enjoyable and productive. In this chapter, we’ll explore the essential tools every beginner gardener should have. By understanding their purpose and how to use them effectively, you’ll be well-equipped to nurture a thriving garden.
Why Having the Right Tools Matters
Gardening can be physically demanding, and using inappropriate tools can lead to frustration, wasted effort, and even injury. In my experience as a Garden Expert, having the right tools tailored to specific tasks saves time, reduces strain, and increases the quality of your work. For example, trying to dig a hole for a plant with a small hand trowel can be exhausting, whereas a spade makes the job smooth and quick.
Moreover, the right tools help maintain plant health. Using clean, sharp tools minimizes damage to roots and stems, reducing the risk of disease. Investing in quality tools that fit comfortably in your hands encourages regular use, which is vital for garden upkeep. As you gain confidence, you’ll appreciate how each tool serves a unique purpose in your gardening routine.
Basic Hand Tools for Every Beginner Gardener
Let’s start with the foundational hand tools you'll want to gather. These are the most frequently used and versatile pieces in your gardening toolkit.
1. Hand Trowel
The hand trowel is your go-to tool for planting, transplanting, and digging small holes. Look for a trowel with a sturdy, rust-resistant blade and a comfortable handle. In my early gardening days, I found that a lightweight aluminum trowel with an ergonomic grip reduced hand fatigue during extended planting sessions. Use it to loosen soil around roots and to dig holes for seedlings or bulbs.
2. Pruning Shears (Secateurs)
Pruning shears are essential for trimming dead or overgrown branches and shaping plants. Sharp, clean shears promote healthy cuts that heal quickly. I recommend bypass pruners for beginners as they make clean cuts on live plants, reducing damage. For example, when trimming rose bushes, well-maintained pruning shears help prevent torn stems that can attract pests and disease.
3. Garden Gloves
Protect your hands from thorns, dirt, and blisters with a good pair of garden gloves. Choose gloves made from breathable, durable materials that fit well. My personal favorite is a pair reinforced with leather palms and fingertips, which offer both protection and dexterity. Wearing gloves also reduces the risk of infections from soil-borne bacteria.
4. Garden Fork
A garden fork is excellent for loosening and turning soil, aerating beds, and breaking up compacted earth. Unlike a shovel, a fork’s tines penetrate the soil easily without excessive disruption of soil layers. I use a garden fork before planting each spring to improve soil texture and drainage, which leads to healthier plant roots.
5. Watering Can or Hose with Adjustable Nozzle
Consistent watering is vital, and having the right watering tool makes a difference. For small gardens or container plants, a watering can with a rose (sprinkler head) is ideal for gentle, even watering. For larger areas, a hose equipped with an adjustable nozzle allows you to control water flow and coverage. In my experience, watering in the early morning with a gentle spray reduces water waste and helps prevent fungal diseases.
Additional Tools to Enhance Your Gardening Experience
Once you've mastered the basics, these additional tools can help you tackle more advanced tasks efficiently.
1. Spade
A spade is a must-have for digging larger holes, edging beds, and moving soil. Its flat, sharp blade is perfect for cutting through tough soil and roots. I recall a beginner gardener who struggled to plant a small tree until I introduced her to a spade, which made the process much smoother and less tiring.
2. Hoe
Hoes are invaluable for weeding and cultivating soil. They come in various shapes; a draw hoe is great for chopping weeds just below the soil surface, while a stirrup hoe allows quick back-and-forth motion for light weed control. Using a hoe regularly keeps weeds from competing with your plants for nutrients and water.
3. Rake
A rake is useful for leveling soil, gathering leaves, and clearing debris. A garden rake with sturdy metal tines helps prepare seedbeds by breaking up clumps and smoothing the surface. After a windy day, I often use a rake to clean fallen leaves and maintain a tidy garden.
Caring for Your Tools: Maintenance Tips
Investing in quality tools is only part of the equation. Proper maintenance ensures they last and perform well. Here are some tips I’ve learned over the years:
- Clean after use: Remove soil and plant residue with a wire brush or cloth to prevent rust and disease spread.
- Sharpen blades: Use a sharpening stone or file on pruning shears and spades regularly to keep cuts clean and efficient.
- Oil metal parts: Applying a light coat of oil prevents rust and keeps moving parts functioning smoothly.
- Store properly: Keep tools in a dry shed or garage, hanging them if possible to avoid damage.
Regular maintenance not only extends tool life but also ensures safety and better gardening results.
Case Study: How the Right Tools Transformed a Beginner Gardener’s Experience
Consider Sarah, a novice gardener who started with only a trowel and gloves. She often felt discouraged by slow progress and sore hands. After consulting with me and upgrading her toolkit to include pruning shears, a spade, and a watering can with an adjustable nozzle, her gardening became more efficient and enjoyable. With the proper tools, she was able to prepare beds faster, prune plants more cleanly, and water evenly, resulting in healthier plants and a renewed passion for her garden.
Summary and Key Takeaways
Starting your gardening journey with the right tools is crucial for success and enjoyment. Essential hand tools like the hand trowel, pruning shears, garden gloves, garden fork, and watering equipment form the foundation of your toolkit. As you develop your skills, additional tools such as spades, hoes, and rakes will help you tackle more complex tasks.
Remember, investing in quality tools and maintaining them properly will save you time, effort, and frustration. Clean, sharp, and well-cared-for tools promote plant health and make gardening a rewarding experience.
In the next chapter, we’ll explore how to prepare your garden space effectively, including soil preparation and selecting the best planting locations. With your tools ready, you’ll be fully equipped to create a thriving garden from the ground up.
Soil Science: Preparing Your Garden’s Foundation
Soil Science: Preparing Your Garden’s Foundation
Understand soil types and how to improve soil health for thriving plants
When I first started gardening, I was eager to plant seeds and see quick results. However, I soon discovered that the secret to a flourishing garden lies beneath the surface—in the soil. Soil is not merely dirt; it is a complex ecosystem that supports plant life, supplies nutrients, retains water, and anchors roots. Without healthy soil, even the best seeds and careful watering won’t yield strong plants. In this chapter, I’ll guide you through the essentials of soil science, helping you understand soil types and how to improve soil health so your garden can thrive.
What Is Soil and Why Does It Matter?
Soil is a dynamic mixture of minerals, organic matter, air, and water. It serves as the primary medium for plant growth. Each component plays a vital role:
- Minerals: These come from weathered rocks and provide essential nutrients like nitrogen, phosphorus, and potassium.
- Organic Matter: Decayed plant and animal material that enriches soil fertility and structure.
- Air: Oxygen in the soil is crucial for root respiration and beneficial microorganisms.
- Water: Carries nutrients and keeps plants hydrated.
Healthy soil balances these elements, creating an environment where plants can absorb nutrients efficiently. Without it, even the most diligent gardener faces challenges.
Types of Soil: Understanding Your Garden’s Foundation
One of the first steps in preparing your garden is identifying your soil type. Soil is generally classified into three main categories based on texture: sandy, clay, and loam. Each has unique characteristics that affect water retention, nutrient availability, and root growth.
Sandy Soil
Sandy soil contains large particles and feels gritty. It drains quickly, which prevents waterlogging but also means it holds fewer nutrients. Gardeners with sandy soil often find their plants need frequent watering and fertilizing. For example, when I worked with a gardener in a coastal area, we improved sandy soil by adding organic compost and mulch to increase moisture retention.
Clay Soil
Clay soil has very fine particles that compact tightly, feeling sticky when wet and hard when dry. It retains water well but can become waterlogged, suffocating roots. Clay soil is often rich in nutrients but requires amendment for better aeration. In my experience, mixing clay soil with coarse sand and organic matter can drastically improve its texture and drainage.
Loam Soil
Loam soil is the ideal blend of sand, silt, and clay, offering good drainage, nutrient retention, and aeration. It’s dark, crumbly, and easy to work with—perfect for most plants. Many home gardeners are fortunate to have loam soil or something close to it. If your soil isn’t loamy, don’t worry; you can amend it to mimic these ideal conditions.
How to Identify Your Soil Type
Before you start planting, take a moment to test your soil’s texture. Here’s a simple method I recommend:
- Take a small handful of moist soil and rub it between your fingers.
- If it feels gritty and doesn’t hold shape, it’s likely sandy.
- If it’s sticky and forms a ribbon when pressed between thumb and forefinger, it’s clay.
- If it’s smooth, crumbly, and holds shape without being sticky, it’s probably loam.
For a more detailed analysis, consider sending a soil sample to a local extension service or garden center. They can provide nutrient content and pH levels, which are crucial for plant health.
Soil pH: The Hidden Factor Affecting Plant Growth
Soil pH measures how acidic or alkaline your soil is, on a scale from 0 to 14. Most plants prefer a pH between 6.0 and 7.5, but some thrive outside this range. For example, blueberries prefer acidic soil (pH 4.5 to 5.5), while lavender prefers slightly alkaline conditions.
In my experience as a Garden Expert, testing pH early can save frustration. You can buy simple pH test kits or send samples for lab analysis. If your soil is too acidic, adding lime can raise the pH. To lower pH, sulfur or organic materials like pine needles can help. Adjusting soil pH ensures nutrients are available to your plants and encourages healthy growth.
Improving Soil Health: Building Your Garden’s Foundation
Once you know your soil type and pH, the next step is improving soil health. Healthy soil is alive with beneficial microbes, rich in organic matter, and well-structured for roots to penetrate. Here are practical ways to enhance your soil:
1. Add Organic Matter Regularly
Organic matter such as compost, aged manure, leaf mold, or kitchen scraps feeds soil microbes and improves texture. Compost also increases the soil’s ability to hold moisture and nutrients. When I began composting in my own garden, I noticed a marked improvement in plant vigor and reduced need for chemical fertilizers.
2. Use Mulch to Protect and Nourish
Mulching with straw, wood chips, or shredded leaves helps retain moisture, suppress weeds, and slowly releases nutrients as it breaks down. Mulch also protects soil from erosion and temperature extremes, creating a stable environment for roots.
3. Practice Crop Rotation and Cover Crops
Rotating plant families and using cover crops like clover or legumes can prevent nutrient depletion and improve soil structure. Cover crops add nitrogen and organic matter when tilled into the soil. In community gardens where I’ve volunteered, crop rotation has been essential in maintaining soil fertility over the years.
4. Avoid Soil Compaction
Compacted soil restricts root growth and water infiltration. Avoid walking on garden beds and use raised beds or designated paths. Lightly till or aerate the soil if it becomes compacted, but avoid over-tilling as it can harm soil structure.
Case Study: Transforming Poor Soil into a Productive Garden
Let me share an example from my early gardening days. A friend had a backyard with heavy clay soil that was waterlogged in winter and cracked in summer. We started by mixing in generous amounts of compost and coarse sand, followed by mulching heavily after planting. After two seasons, the soil became crumbly and retained moisture better. The plants were healthier, and yields improved dramatically. This experience taught me the power of patience and consistent soil care.
Summary and Key Takeaways
- Soil is the foundation of your garden, consisting of minerals, organic matter, air, and water.
- Identify your soil type—sandy, clay, or loam—to understand its strengths and limitations.
- Test and adjust soil pH to optimize nutrient availability for your plants.
- Improve soil health by adding organic matter, mulching, practicing crop rotation, and preventing compaction.
- Healthy soil creates a thriving environment for your plants, leading to better growth and harvests.
With a solid understanding of soil science and a commitment to nurturing your garden’s foundation, you are well on your way to successful gardening. Next, we’ll explore how to select the right plants for your garden’s conditions and your personal goals, ensuring your efforts yield rewarding results.
Seeds and Starters: Choosing and Planting the Right Greens
Seeds and Starters: Choosing and Planting the Right Greens
Master the art of selecting and starting plants from seeds and seedlings
When I first began gardening, I was overwhelmed by the sheer variety of seeds and young plants available. It felt like choosing the right starter was a game of chance rather than a well-informed decision. However, as I gained experience, I discovered that selecting the proper seeds and seedlings is one of the most rewarding and foundational steps in creating a thriving home garden. Starting with the right greens not only sets you up for success but also deepens your connection with the gardening process.
Understanding Seeds: The Foundation of Your Garden
Seeds are nature’s incredible way of preserving plant life, packed with everything needed to grow a full plant. But not all seeds are created equal, and knowing how to choose them can make a significant difference in your garden’s outcome.
Types of Seeds to Consider
- Heirloom Seeds: These seeds come from plants that have been passed down for generations, prized for their rich flavors and genetic diversity. I recommend heirloom seeds for gardeners interested in preserving heritage plants and enjoying unique varieties not found in supermarkets.
- Hybrid Seeds: Created by crossbreeding different plant varieties, hybrids often boast improved disease resistance and higher yields. If you’re looking for reliability and vigor, hybrids can be a great choice, especially for beginners.
- Organic Seeds: These seeds come from plants grown without synthetic pesticides or fertilizers, aligning with organic gardening principles. Choosing organic seeds supports sustainable gardening and can result in healthier plants.
Example: In my early gardening days, I started with hybrid tomato seeds known for their resistance to blight, which saved me from many common tomato diseases. Later, I experimented with heirloom tomatoes like ‘Brandywine’ to enjoy richer flavors, though they required more care.
Choosing Seeds Based on Climate and Season
One of the most common mistakes beginners make is selecting seeds without considering their local climate and planting season. Each plant has a preferred temperature range and daylight requirement.
- Cool-season crops like lettuce, spinach, and peas thrive in spring or fall when temperatures are mild.
- Warm-season crops such as tomatoes, peppers, and beans need warmer soil and air temperatures to germinate and grow well.
Before buying seeds, check the seed packet for planting dates and temperature guidelines. If you live in a region with a short growing season, starting seeds indoors can extend your planting window.
Starting Seeds Indoors vs. Direct Sowing
Indoor Seed Starting
Starting seeds indoors gives you control over temperature, moisture, and light, increasing germination success. In my experience as a Garden Expert, indoor seed starting is invaluable for plants with long growing seasons or those sensitive to cold soil.
- Materials needed: seed trays or small pots, seed starting mix (a fine, well-draining medium), and a warm, well-lit area.
- Steps: Sow seeds according to packet depth instructions, keep soil moist but not soggy, and provide warmth—usually between 65–75°F (18–24°C).
Example: I start peppers and tomatoes indoors about 6-8 weeks before the last frost date to ensure they are strong seedlings when transplanted outside.
Direct Sowing
Some plants prefer to be sown directly into the garden soil. Root vegetables like carrots and radishes, and many peas and beans, dislike being transplanted and perform best when grown from seeds sown directly into the ground.
- Prepare your soil by loosening it and removing weeds.
- Sow seeds at the recommended depth and spacing from the seed packet.
- Keep the soil consistently moist until seedlings emerge.
In my experience, direct sowing is simpler for fast-growing crops and helps avoid the shock seedlings sometimes face during transplanting.
Selecting Seedlings and Starters from Nurseries
For gardeners who prefer to skip the seed-starting phase or want a head start, purchasing seedlings or starter plants from local nurseries is an excellent option. Choosing healthy starters ensures your plants will thrive once transplanted.
What to Look for in Seedlings
- Vigorous Growth: Healthy seedlings should be sturdy with strong stems, vibrant leaves, and a deep green color. Avoid plants that look leggy, yellowed, or wilted.
- Root Health: If possible, gently check the root ball. It should be well-developed without circling roots, which indicate root-bound plants that may struggle to establish.
- Disease and Pest Check: Inspect leaves and stems for spots, holes, or pests. Healthy plants will be free from these issues.
Example: When I purchase lettuce starters, I look for compact, bushy plants rather than tall, spindly ones. This habit ensures a fuller, more productive harvest.
Timing Your Transplant
Transplant seedlings only after hardening them off—a process that acclimates young plants to outdoor conditions. I recommend exposing seedlings to outdoor sunlight and breeze for a few hours daily over a week, gradually increasing their time outside.
- Transplant on a cloudy day or late afternoon to reduce transplant shock.
- Water thoroughly before and after planting to help roots settle.
- Plant seedlings at the same soil depth as they were growing indoors to prevent stem rot.
Practical Tips for Successful Seed and Starter Planting
- Read and follow seed packet instructions carefully—they contain vital information about planting depth, spacing, and care.
- Label your plantings to keep track of varieties and planting dates.
- Keep soil consistently moist but not waterlogged during germination.
- Provide adequate light—seedlings need at least 12-16 hours of light daily, ideally from a grow light or sunny window.
- Practice patience—germination times vary, and some seeds take longer than others to sprout.
In my own garden, I keep a detailed planting journal. By noting seed varieties, planting dates, and germination success, I can refine my practices each season for better results.
Summary and Key Takeaways
Choosing and planting the right seeds and starters is the cornerstone of a successful home garden. Understanding the types of seeds, matching them to your climate and season, and deciding between indoor seed starting or direct sowing are critical decisions. When buying seedlings, selecting healthy plants and properly acclimating them before transplanting can significantly boost your harvest. By following these guidelines, you’ll nurture strong plants ready to flourish in your garden.
As we move forward, the next chapter will explore how to prepare your soil and garden beds to create the ideal environment for your seeds and starters to thrive. Preparing the ground is just as important as choosing the right plants, and I’ll guide you step-by-step through this essential phase.
Watering Wisdom: Techniques for Healthy Plants
Watering Wisdom: Techniques for Healthy Plants
Learn When, How, and How Much to Water Your Garden Effectively
Did you know that overwatering is one of the most common mistakes new gardeners make? In fact, giving your plants too much water can be just as harmful as neglecting them altogether. As a Garden Expert, I've seen many beginners struggle with this balance, often leading to root rot or stunted growth. Understanding the art and science of watering is foundational for any gardener, and mastering it will ensure your plants thrive right from the start.
Understanding Plant Water Needs
Each plant has its own unique water requirements, influenced by factors such as the species, soil type, climate, and growth stage. For example, succulent plants like aloe vera require much less water than leafy vegetables like lettuce. Similarly, young seedlings need consistent moisture while established plants can tolerate occasional drying out of the soil.
In my experience as a Garden Expert, the key is to observe your plants closely and adjust watering based on their behavior. Wilting, yellowing leaves, or dry soil are often signs of under-watering, while soggy soil and mold growth suggest overwatering.
Case Study: Tomatoes vs. Cacti
Consider the tomato plant, a favorite for home gardeners. Tomatoes thrive with deep watering that reaches their root zone, about 1-2 inches per week. Shallow watering encourages weak roots and poor fruit development. On the other hand, cacti store water in their thick stems and prefer infrequent watering, only when their soil is completely dry. Applying these watering techniques correctly can mean the difference between a bountiful harvest and a struggling plant.
When to Water: Timing Matters
The timing of watering can greatly affect plant health and water efficiency. The best time to water your garden is early in the morning before the heat of the day sets in. Morning watering allows plants to absorb moisture and reduces evaporation loss. It also helps prevent fungal diseases since leaves dry quickly during the day.
Evening watering is sometimes practiced, but it can leave plants damp overnight, encouraging mold and mildew. Avoid watering during the hottest part of the day, as water droplets on leaves can act like tiny magnifying glasses and scorch the foliage.
Example: Morning Watering Benefits
A beginner gardener I worked with was watering her herbs late in the afternoon. She noticed persistent powdery mildew on her basil plants. After shifting her watering schedule to early mornings, the mildew cleared up and the herbs grew robustly. This simple timing adjustment made a big difference.
How to Water: Techniques for Maximum Effectiveness
Watering is not just about pouring water; it’s about delivering it efficiently to where plants need it most—the roots. Here are some watering techniques that I recommend:
- Deep Watering: Water slowly and deeply so water soaks into the soil to encourage deep root growth. This can be done using a drip irrigation system, soaker hoses, or a watering can with a gentle flow.
- Surface Watering: Avoid shallow watering that wets only the surface. This encourages roots to stay near the soil surface, making plants vulnerable to drought stress.
- Water at the Base: Aim to water the soil around the plant base rather than the leaves to minimize water loss and reduce the risk of fungal diseases.
Case Study: Drip Irrigation Success
I once helped a community garden install drip irrigation. This system delivered water directly to plant roots with minimal waste. Not only did plant health improve, but the gardeners also reduced their water bills. For beginners, drip irrigation or soaker hoses can be game changers, especially in dry climates.
How Much to Water: Assessing Soil Moisture
Determining the right amount of water requires monitoring soil moisture rather than guessing. Here are some practical tips:
- Use Your Fingers: Stick your finger 1-2 inches into the soil. If it feels dry at this depth, it’s time to water.
- Soil Moisture Meters: These inexpensive tools give you an accurate reading of moisture levels and can be very helpful for beginners.
- Know Your Soil: Sandy soils drain quickly and may need more frequent watering, while clay soils retain moisture longer.
Remember, the goal is to keep the soil consistently moist but not waterlogged. Overwatering can suffocate roots by filling air spaces in the soil with water, leading to root rot.
Example: Adjusting Water Based on Weather
During a particularly hot summer, I advised a novice gardener to increase watering frequency for her container plants, which dry out faster. Conversely, during a rainy spell, watering was reduced to prevent waterlogging. Being flexible and responsive to weather conditions is vital for plant health.
Additional Tips for Successful Watering
- Mulching: Applying mulch around your plants helps retain soil moisture, reduce evaporation, and regulate soil temperature.
- Container Plants: These require more frequent watering than garden beds because pots dry out faster.
- Water Quality: Use room temperature water when possible. Cold water can shock roots, especially in seedlings.
Summary and Key Takeaways
Watering is both an art and a science, and mastering it is essential for healthy, thriving plants. To recap the key points:
- Understand your plants’ unique water needs and observe their responses.
- Water early in the morning to maximize absorption and reduce disease risk.
- Use deep watering techniques to encourage strong root development.
- Monitor soil moisture regularly to avoid under- or overwatering.
- Adjust watering schedules based on weather, soil type, and container use.
In my experience as a Garden Expert, patience and attentiveness in watering will pay off with healthier plants and a more enjoyable gardening experience. With these techniques in hand, you’re ready to nurture your garden effectively and confidently.
Next, we will explore how to choose the right soil and prepare your garden beds, setting the stage for your plants to flourish from the ground up.
Nurturing Growth: Fertilizers, Mulch, and Plant Care
Nurturing Growth: Fertilizers, Mulch, and Plant Care
Explore nutrient management and care routines to keep your garden flourishing
When I first started gardening, I quickly realized that planting seeds and watering them was only the beginning. The true art of gardening lies in nurturing those plants to thrive, not just survive. Did you know that proper nutrient management and plant care can increase your garden’s yield by up to 50%? This chapter will guide you through essential practices like fertilizing, mulching, and routine plant care that keep your garden healthy and productive.
Understanding Fertilizers: The Fuel for Plant Growth
Fertilizers are often misunderstood or overlooked by beginners, yet they play a critical role in providing the nutrients that plants need to grow strong and healthy. In my experience as a Garden Expert, knowing when and how to fertilize can transform a struggling garden into a flourishing oasis.
What Are Fertilizers?
Fertilizers are substances that supply essential nutrients to plants, primarily nitrogen (N), phosphorus (P), and potassium (K). These macronutrients support various plant functions:
- Nitrogen promotes leafy, green growth.
- Phosphorus supports root development and flowering.
- Potassium enhances overall plant health and disease resistance.
Many fertilizers also contain secondary nutrients like calcium, magnesium, and sulfur, along with trace elements such as iron, zinc, and manganese, which are equally important in small amounts.
Choosing the Right Fertilizer
For beginners, selecting the right fertilizer can feel overwhelming. A balanced fertilizer, often labeled as 10-10-10 or 14-14-14, is a good place to start for most home gardens. However, specific plants may require tailored nutrient ratios. For example, tomatoes benefit from a fertilizer higher in phosphorus to encourage fruiting, while leafy greens thrive with more nitrogen.
Organic fertilizers such as compost, manure, bone meal, and fish emulsion are excellent options for those seeking an eco-friendly approach. I’ve found that integrating organic matter not only feeds the plants but also improves soil structure and moisture retention.
When and How to Fertilize
Timing is critical when applying fertilizers. For many plants, the best time to fertilize is early in the growing season when growth is just beginning. Over-fertilizing or applying fertilizer too late can damage plants or cause excessive leafy growth at the expense of flowers and fruit.
Here are some practical tips for fertilizing your garden:
- Test your soil - Before fertilizing, test your soil’s nutrient levels. Many local extension offices offer affordable soil testing kits.
- Follow package instructions - Fertilizer strength and application rates vary widely.
- Apply evenly - Use a spreader or apply by hand evenly around the base of plants.
- Water after application - This helps nutrients soak into the soil and prevents leaf burn.
In one case, a gardening novice in my community struggled with weak tomato plants. After testing the soil, we discovered a nitrogen deficiency. By applying a balanced fertilizer early and supplementing with compost, the plants quickly recovered, producing healthy fruit by mid-summer.
The Role of Mulch: Protecting and Enriching Your Garden
Mulching is one of the simplest yet most effective ways to care for your garden. It acts as a protective blanket, conserving moisture, regulating soil temperature, and suppressing weeds. In my experience, gardeners who mulch their beds spend less time watering and weeding – freeing up time to enjoy their plants.
Types of Mulch
Mulch comes in two main types: organic and inorganic.
- Organic Mulch: Includes bark chips, straw, grass clippings, shredded leaves, and compost. It breaks down over time, enriching the soil with nutrients.
- Inorganic Mulch: Includes materials like plastic sheeting, gravel, and landscape fabric. These do not decompose but can be effective for weed control and moisture retention.
For beginners, I recommend starting with organic mulch because of its multiple benefits for soil health and plant growth. For example, in a raised bed I managed, applying a 3-inch layer of shredded leaves and grass clippings reduced watering frequency by nearly half during a dry spell and kept tomato plants vigorous.
How to Apply Mulch Properly
To mulch effectively:
- Clear the area of weeds and debris.
- Water the soil thoroughly before applying mulch.
- Spread mulch evenly around plants, maintaining a 2-3 inch depth.
- Keep mulch a few inches away from plant stems to prevent rot.
Mulch should be replenished as it breaks down or washes away, typically once or twice per growing season.
Essential Plant Care Routines for a Thriving Garden
Beyond fertilizers and mulch, daily plant care routines are vital. These simple habits ensure your garden stays healthy and resilient.
Watering Wisely
Water is life for plants, but too much or too little can cause stress and disease. In my experience, the best approach is deep, infrequent watering rather than shallow, frequent watering. This encourages roots to grow deeper and improves drought resistance.
Morning watering is ideal as it allows foliage to dry quickly, reducing fungal problems. Using drip irrigation or soaker hoses can save water and direct moisture to the root zone efficiently.
Pruning and Deadheading
Pruning helps maintain plant shape, removes diseased or dead parts, and stimulates new growth. Deadheading—removing spent flowers—encourages plants to produce more blooms rather than seed.
For example, in my herb garden, regular pruning of basil not only keeps plants bushy but also prevents flowering, which can make leaves bitter. Similarly, deadheading marigolds prolongs their vibrant blooming season.
Monitoring for Pests and Diseases
Regular inspection of your plants is crucial for early pest and disease detection. Look for discolored leaves, holes, spots, or unusual growth patterns. Integrated Pest Management (IPM) techniques, such as encouraging beneficial insects and using organic treatments, provide sustainable control methods.
In one garden I maintain, ladybugs were introduced to control aphids naturally, reducing the need for chemical pesticides and preserving the garden’s ecosystem.
Summary and Key Takeaways
Successful home gardening requires more than just planting seeds; it demands ongoing care and attention to nutrient management and plant health. By understanding and applying the right fertilizers, using mulch effectively, and establishing consistent care routines like proper watering, pruning, and pest monitoring, your garden will flourish.
- Fertilizers supply essential nutrients—choose the right type and apply at the right time.
- Mulch conserves moisture, controls weeds, and improves soil health.
- Water deeply and infrequently for stronger roots.
- Prune and deadhead to encourage growth and blooms.
- Regularly inspect plants to catch pests and diseases early.
With these foundational practices in place, your garden will be well-prepared to grow vigorously. Next, we will explore how to select the best plants for your environment and how to start seeds successfully, setting the stage for a thriving garden from the very beginning.
Troubleshooting: Diagnosing and Solving Common Garden Problems
Troubleshooting: Diagnosing and Solving Common Garden Problems
Gain expert strategies to identify and fix common gardening challenges
When I first started gardening, I was astonished at how a thriving plant could suddenly wilt overnight or how mysterious spots might appear on leaves without warning. The truth is, gardening is as much about problem-solving as it is about planting and nurturing. Every gardener faces challenges—whether it’s pests, diseases, nutrient deficiencies, or environmental stress—and knowing how to recognize and address these issues is key to a successful garden.
In this chapter, I’ll guide you through practical ways to diagnose and troubleshoot common garden problems. With these strategies, you’ll gain confidence in maintaining a healthy garden and turning setbacks into learning opportunities.
Identifying Plant Stress: The First Step to a Healthy Garden
One of the most critical skills for a beginner gardener is learning to observe your plants carefully. Plants can’t tell us what’s wrong, but their leaves, stems, and overall appearance often reveal the nature of the problem. In my experience as a Garden Expert, paying close attention to visual cues is the best way to start diagnosing issues.
Common Symptoms and What They Mean
- Yellowing leaves: Often a sign of nutrient deficiency, overwatering, or poor drainage.
- Browning leaf edges: Can indicate underwatering, salt buildup in the soil, or excessive sun exposure.
- Wilting: Usually caused by lack of water, root damage, or root rot.
- Spots or discoloration: May suggest fungal or bacterial infections.
- Holes or chewed leaves: A clear sign of insect pests.
For example, I once observed a tomato plant with yellowing leaves that started from the bottom. Initially, I suspected overwatering, but after testing the soil drainage and checking the roots, I discovered the problem was a nitrogen deficiency. Once I amended the soil with an organic nitrogen-rich fertilizer, the plant quickly bounced back.
Diagnosing Soil and Water Issues
Soil and water quality are pillars of garden health. Problems in these areas often manifest as stress symptoms in your plants, but they can be subtle and easy to overlook.
Testing Soil Health
Healthy soil is well-draining, fertile, and rich in organic matter. To diagnose soil issues:
- Perform a soil texture test: Take a handful of moist soil and squeeze it. If it crumbles easily, it’s well-draining. If it forms a sticky ball, it may retain too much water.
- Check pH levels: Most vegetables and flowers thrive in slightly acidic to neutral soil (pH 6.0-7.0). You can use an affordable soil testing kit to measure this.
- Look for compaction: Hard, compacted soil restricts root growth and water infiltration.
As an example, a new gardener I worked with was frustrated by poor growth in her garden bed. After testing, we found the soil was highly compacted clay, which held water and suffocated roots. By incorporating organic compost and gently tilling the soil, we improved aeration and drainage, resulting in healthier plants within weeks.
Watering Challenges
Watering is deceptively tricky. Overwatering can cause root rot and fungal diseases; underwatering stresses plants and slows growth.
- Check soil moisture: Stick your finger about an inch into the soil. If it feels dry, it’s time to water.
- Water deeply and less frequently: Shallow watering leads to weak roots.
- Consider the plant’s needs: Desert plants require far less water than leafy vegetables.
In my experience, setting a consistent watering schedule and adjusting it according to weather and plant type prevents many common problems.
Managing Pests and Diseases
Pests and diseases are among the most daunting challenges for new gardeners. However, understanding their behavior and early signs can empower you to control them effectively.
Recognizing Common Garden Pests
Some of the most frequent pests you’ll encounter include aphids, slugs, caterpillars, and spider mites. Here’s how to spot and manage them:
- Aphids: Tiny green or black insects clustered on new growth. They suck plant sap, causing leaves to curl and yellow.
- Slugs and snails: Leave irregular holes in leaves and shiny slime trails.
- Caterpillars: Larger chewing pests that can defoliate plants rapidly.
- Spider mites: Tiny, hard-to-see pests that cause stippling or fine webbing on leaves.
One memorable case involved a rose bush attacked by aphids. Introducing ladybugs—a natural predator—quickly reduced the aphid population without chemicals, restoring the plant’s vigor.
Identifying Fungal and Bacterial Diseases
Diseases often present as spots, wilting, or unusual growths. Common garden diseases include powdery mildew, blight, and rust.
- Powdery mildew: White, powdery coating on leaves, which thrives in humid conditions.
- Blight: Causes dark, sunken lesions on leaves and stems.
- Rust: Orange or reddish pustules on the undersides of leaves.
To manage these issues:
- Remove affected plant parts promptly to reduce spread.
- Ensure proper spacing for air circulation.
- Use organic fungicides or homemade remedies like neem oil as preventive measures.
In one instance, I noticed early signs of powdery mildew on cucumber plants. By improving airflow through pruning and applying a baking soda spray, I was able to halt the disease before it caused significant damage.
Preventative Practices to Avoid Future Problems
While troubleshooting is essential, prevention is always better than cure. Here are some expert tips to keep common garden problems at bay:
- Rotate crops: Avoid planting the same species in the same spot yearly to reduce disease buildup.
- Choose disease-resistant varieties: Many modern plants are bred for resistance to common pests and diseases.
- Maintain garden hygiene: Remove plant debris and weeds that harbor pests.
- Monitor regularly: Frequent inspections allow early detection and intervention.
Implementing these practices creates a resilient garden environment that minimizes the need for drastic measures.
Summary and Key Takeaways
Gardening challenges are inevitable, but with the right approach, they become manageable learning experiences. Start by carefully observing your plants and soil to identify symptoms accurately. Test soil health and adjust watering routines to meet your plants’ specific needs. Recognize common pests and diseases early, employing natural and sustainable solutions whenever possible. Lastly, adopt preventative habits like crop rotation and regular garden maintenance to reduce future problems.
As a Garden Expert, I’ve found that developing these diagnostic skills transforms gardening from a frustrating task into a rewarding journey where you grow alongside your plants. Armed with this knowledge, you’re ready to tackle the next step—choosing the right plants and preparing your garden beds, which I’ll cover in the following chapter.
Seasonal Gardening: Adapting Your Garden Throughout the Year
Seasonal Gardening: Adapting Your Garden Throughout the Year
Plan for continuous success by understanding seasonal gardening cycles
Imagine stepping outside your door every few weeks to discover new growth, fresh blooms, or ripe vegetables ready to harvest. This is the joy of seasonal gardening—a dynamic process that, when well understood, can keep your garden thriving year-round. As a Garden Expert, I’ve witnessed many beginners feel overwhelmed by the changing seasons, but once you learn to work with nature’s cycles, your garden becomes a source of continuous success and satisfaction.
Why Seasonal Gardening Matters
Gardening is intrinsically tied to the seasons. Each time of year offers unique opportunities and challenges, from the chill of winter to the heat of summer. Plants have evolved to grow best under certain conditions, and by aligning your gardening activities with these natural rhythms, you can maximize growth, reduce pest problems, and enjoy a more abundant harvest.
Seasonal gardening is not just about planting and harvesting; it’s about adjusting your approach to watering, fertilizing, pruning, and protecting your plants throughout the year. This strategy helps prevent burnout—both for your garden and yourself.
Understanding the Four Seasons in Gardening
In most temperate climates, gardening revolves around four distinct seasons: spring, summer, fall, and winter. Each season requires specific tasks and plant choices to keep your garden healthy and productive.
- Spring: The season of renewal and planting.
- Summer: Growth and maintenance.
- Fall: Harvest and preparation for dormancy.
- Winter: Rest, protection, and planning.
Let’s explore each season in detail to see how you can adapt your gardening practices.
Spring: The Season of Renewal
Spring is often the most exciting time for beginner gardeners. After the cold months, the soil warms, days lengthen, and plants sense it’s time to grow. The key to a successful spring garden is preparation and timely action.
Preparing Your Soil and Garden Beds
Before planting, I recommend testing your soil’s pH and nutrient levels. Knowing this helps you choose the right amendments—such as compost, lime, or organic fertilizers—to create an ideal environment for seedlings.
In my experience as a Garden Expert, enriching your soil in early spring leads to stronger roots and better plant health throughout the season. Start by removing any debris and weeds accumulated over winter, then turn the soil to improve aeration.
Choosing the Right Plants for Spring
Cool-season crops like lettuce, spinach, radishes, and peas thrive in early spring. These vegetables tolerate light frosts and can be direct-seeded into the garden. For flowers, consider pansies, snapdragons, and primroses to brighten your space.
For example, a beginner gardener I worked with planted peas and spinach in March, then followed up with warm-season crops later. This staggered approach ensured continuous harvest and minimized empty garden space.
Planting Tips
- Start seeds indoors for warm-season crops such as tomatoes and peppers while the outdoor soil is still cool.
- Harden off seedlings by gradually exposing them to outdoor conditions before transplanting.
- Water newly planted seeds gently but consistently to encourage germination.
Summer: Growth and Maintenance
Summer is a period of rapid growth and often the most demanding season for gardeners. Plants need consistent care to thrive under the sun’s intensity and higher temperatures.
Watering Wisely
One common mistake beginners make is overwatering or watering at the wrong time of day. Early morning watering is best, as it reduces evaporation and helps plants withstand midday heat.
In my experience, installing a simple drip irrigation system or soaker hoses can save water and ensure deep watering at the roots, where plants need it most.
Controlling Pests and Diseases
Warm weather often brings insects and fungal diseases. Regularly inspect your plants for signs of damage, such as yellowing leaves or holes.
For example, I once helped a gardener identify aphids on her tomatoes early enough to use natural predators like ladybugs, preventing a larger infestation.
Fertilizing and Pruning
Summer plants benefit from supplemental feeding. Use balanced organic fertilizers to support flowering and fruiting. Prune dead or diseased growth to improve air circulation and plant vigor.
Fall: Harvest and Preparation
As temperatures cool, your garden enters a phase of harvesting and preparing for the upcoming winter. Fall is an excellent time to enjoy the fruits of your labor and ready the soil for next year.
Harvesting Tips
Many vegetables, like pumpkins, squash, and carrots, reach their peak in fall. Harvest them at the right time to maximize flavor and storage life.
In my experience as a Garden Expert, harvesting in the morning when plants are crisp and cool preserves freshness longer.
Soil Care and Cover Crops
After harvesting, it’s important to nourish and protect your soil. Adding organic matter, such as compost or well-rotted manure, replenishes nutrients. Planting cover crops like clover or rye prevents erosion and improves soil structure.
A gardener I advised planted winter rye in her vegetable beds every fall, which led to healthier soil and better yields the following spring.
Planting for Fall and Winter
Some crops, like garlic and certain leafy greens, can be planted in fall to overwinter and mature early in spring. This strategy extends your gardening season and ensures a steady supply of fresh produce.
Winter: Rest, Protection, and Planning
Although winter may seem like a dormant time, it’s a season full of opportunities to care for your garden and prepare for future growth.
Protecting Plants from Cold
Frosts and freezing temperatures can damage tender plants. Use mulch, row covers, or cold frames to shield vulnerable crops.
In my experience, even simple straw mulch around perennials and root vegetables can prevent soil heaving and root damage during freeze-thaw cycles.
Planning and Learning
Winter is ideal for reflecting on the past season’s successes and challenges. Use this time to plan your garden layout, order seeds, and read up on new techniques.
Keeping a gardening journal throughout the year helps track what works and what doesn’t, making each season more productive than the last.
Summary and Key Takeaways
- Seasonal gardening aligns your activities with nature’s rhythms, improving plant health and yields.
- Spring is for soil preparation and planting cool-season crops; summer demands diligent watering and pest control.
- Fall focuses on harvesting, soil enrichment, and planting for overwintering; winter is for protection and planning.
- Adapting your garden care to each season prevents problems and promotes continuous success.
Understanding and embracing these seasonal cycles is the foundation of a thriving home garden. In the next chapter, we will explore how to select the right plants for your specific environment, ensuring your garden flourishes no matter where you live.
Harvest and Beyond: Enjoying and Sustaining Your Garden’s Bounty
Harvest and Beyond: Enjoying and Sustaining Your Garden’s Bounty
Learn how to harvest, store, and plan for long-term gardening success
Imagine stepping into your garden on a crisp morning, the air alive with the scent of fresh herbs and ripened vegetables ready to be picked. Harvesting your own produce is one of the most rewarding moments in home gardening—it’s the tangible result of your patience, care, and effort. As a Garden Expert, I’ve seen firsthand how proper harvesting techniques not only maximize yield but also set the stage for continued garden health and productivity.
When and How to Harvest for Optimal Flavor and Yield
Timing is everything when it comes to harvesting. Picking your fruits and vegetables too early or too late can affect their taste, texture, and nutritional value. Understanding the ideal harvest window for each crop is essential.
Recognizing the Signs of Readiness
Different plants have different indicators of readiness. For example:
- Tomatoes: Should be fully colored (red, orange, or yellow depending on variety) and slightly soft to the touch.
- Leafy Greens: Such as lettuce or spinach, are best harvested when leaves are tender and young, usually before they bolt.
- Root Vegetables: Carrots and radishes are ready when their tops visibly push up through the soil.
In my experience as a Garden Expert, using a sharp pair of scissors or garden shears for delicate crops like herbs and leafy greens helps prevent damage to the plant, encouraging further growth. For sturdier vegetables, a gentle twist or pull often works well.
Harvesting Techniques to Preserve Plant Health
Proper technique is crucial to avoid harming the plant and to extend your harvest season. For example, when harvesting beans or peas, pick them regularly to encourage more pods to grow. Avoid uprooting entire plants unless they are at the end of their life cycle.
“Regular harvesting is like giving your plants a ‘job well done’ reward—they respond by producing more.”
Case in point: I once worked with a beginner gardener who picked cucumbers only when they were large and overripe. After switching to daily checks and harvesting smaller, tender cucumbers, their plants yielded nearly twice as much over the season.
Storing and Preserving Your Harvest
Once harvested, how you store and preserve your produce influences how long you can enjoy your garden’s bounty. Fresh produce is perishable, but with proper care, you can extend its shelf life significantly.
Fresh Storage Tips
Most vegetables and fruits benefit from cool, humid environments. For example:
- Leafy greens: Store in perforated plastic bags in the refrigerator to retain moisture while allowing air circulation.
- Root vegetables: Carrots and beets keep well in a cool, dark place, ideally in a box with moist sand or sawdust.
- Tomatoes: Best kept at room temperature, away from direct sunlight, to preserve their flavor and texture.
In my experience as a Garden Expert, investing in a quality root cellar or even a simple cool, dark basement corner can dramatically reduce waste during the colder months.
Preservation Methods for Long-Term Enjoyment
To savor your harvest year-round, consider preservation techniques such as:
- Freezing: Many vegetables like peas, corn, and beans freeze well. Blanching before freezing helps preserve color and nutrients.
- Drying: Herbs, tomatoes, and peppers can be dried for later use in cooking. Using a dehydrator or air drying in a low-humidity area works effectively.
- Canning: This method allows storage for months or even years. Proper sterilization and following tested recipes are crucial for safety.
- Pickling: Cucumbers, beets, and other vegetables can be pickled to create flavorful preserves.
For example, a gardener I mentored started freezing their surplus green beans after blanching and found it provided fresh-tasting vegetables through the winter, reducing their grocery bills and enhancing their meals.
Planning Ahead for Sustainable Gardening Success
Enjoying your harvest is just one part of the gardening journey. Planning for the next season ensures that your garden continues to thrive year after year.
Crop Rotation and Soil Health
Rotating crops is a vital practice to maintain soil fertility and reduce pest and disease buildup. For instance, planting legumes one season enriches soil nitrogen for the following crops like tomatoes or peppers.
Keep a garden journal to track which plants were grown where and when, as this helps you plan rotations and avoid planting the same family of vegetables in the same place repeatedly.
Saving Seeds for Future Planting
Saving seeds from your healthiest plants is a rewarding way to sustain your garden. Select fully mature, disease-free specimens for seed collection. Dry and store seeds in a cool, dry place in labeled envelopes or containers.
I encourage beginners to start with easy-to-save seeds like beans, peas, and lettuce. This practice not only cuts costs but also helps you develop plants adapted to your local conditions.
Continuous Learning and Adaptation
Gardening is an evolving skill. Each season brings new challenges and lessons. Review your successes and failures, seek advice from fellow gardeners, and stay curious about new techniques and varieties.
For example, experimenting with companion planting—such as growing basil near tomatoes to improve flavor and deter pests—can enhance your garden’s health and productivity.
Summary and Key Takeaways
- Harvest at the right time using proper techniques to maximize flavor, yield, and plant health.
- Store fresh produce under optimal conditions to prolong freshness and reduce waste.
- Use preservation methods like freezing, drying, canning, and pickling to enjoy your harvest year-round.
- Plan for sustainable gardening through crop rotation, seed saving, and continuous learning.
As a Garden Expert, I’ve found that the joy of gardening extends far beyond the harvest. It’s about nurturing a cycle of growth, enjoyment, and renewal that sustains your garden and your passion. In the next chapter, we’ll dive into soil preparation and composting—the foundation for healthy plants and bountiful harvests.